
Every wooden bowl, chopping board or serving dish begins its life deep in the forest – as a living tree. Working oak is a craft that brings together nature, physics and the skill of the woodworker: from choosing the right tree, through precise sawing, years of patient drying and turning on the lathe, to the final oil finish. This guide takes you through the whole process step by step, and an interactive quiz will test what you have learnt.
🌳 Quiz: Do you know the journey of oak from forest to product?
Test yourself with our woodworking quiz – from choosing the tree to the finished bowl. Three difficulty levels, 36 questions and plenty of interesting facts.
🌿 Looking for a bowl or board made of solid wood? At AMADEA you will find handmade wooden bowls and plates and kitchen and serving boards made from wood from Czech forests – treated with natural oil.
Browse wooden kitchenwareA guide to working oak: 7 steps from forest to bowl
Below we describe each production step in detail – from how the right tree is chosen, through the physics of drying, to the chemistry of the finish. Understanding the whole process will help you appreciate every wooden product you hold in your hands.
Step 1 – Choosing the tree (Quercus robur / Quercus petraea)

Not every oak is suitable for fine woodwork. Foresters and woodworkers look for trees with a straight trunk, without large knots or visible cracks. The ideal is an oak aged 80–150 years with a trunk diameter of at least 40–60 cm. In Czech forests, joinery mainly uses pedunculate oak (Quercus robur) and sessile oak (Quercus petraea), which grows particularly in the hill country of Central Bohemia and Moravia.
Trees are ideally selected during winter dormancy, when they have no leaves and it is easier to judge the shape of the crown and the condition of the trunk. Altitude matters too – oak from higher elevations grows more slowly, has denser wood and narrower growth rings, which makes the final product more compact and longer-lasting. Selective felling (managing a continuous-cover forest) is gentler on the ecosystem than clear-cutting, and more and more sawmills prefer it for economic reasons as well, because of the quality of the timber.
Step 2 – Felling and sawing into planks (logs, poles, planks)

After felling, the trunk is limbed on site (its branches removed) and cut into saw logs – sections usually 2–4 metres long. These logs travel to the sawmill, where the key step takes place: breaking down the trunk. The way it is sawn has a major effect on both yield and the final appearance of the wood.
There are three basic types of cut. A tangential cut (flat-sawn, lengthwise along a tangent to the growth rings) gives planks with a beautiful wavy figure, but the wood moves and twists more. A radial cut (quarter-sawn, from the centre towards the bark) reveals oak's characteristic medullary rays – pale, shiny flecks with a pearly lustre. This cut is more stable but has a lower yield. A cross cut (end grain) is used for special products – you can see the full growth rings as concentric circles. For bowls and boards, a combination of tangential and radial cuts is most often chosen depending on the part of the trunk.
Step 3 – Air drying (natural seasoning, equilibrium moisture content)

Freshly sawn oak contains 50–80 % water – more than half of its weight! If such wood were worked straight away, the product would crack, warp or lose its shape as it dried. Drying is therefore the longest and most important step of the whole process.
In air drying, planks are stacked in ventilated piles with wooden spacers (stickers) between each layer – these let the air flow through. The stack stands under cover where air circulates freely, but the wood is not exposed to direct rain or sun. A rough rule applies: 1 year of drying per 1 cm of plank thickness. Oak is one of the slowest-drying species – a 5 cm oak plank takes about 5 years. The final moisture content for indoor products should be 8–12 %.
The alternative is kiln drying (a chamber with controlled temperature and humidity), which shortens the process to 4–8 weeks. Air-dried wood, however, is generally more stable – kiln drying that runs too fast can cause internal stresses and micro-cracks. That is why many quality woodworkers combine both methods: first air drying, then a short finishing cycle in the kiln.
Step 4 – Machining: planing, milling and preparing the blank (joinery machining)
Dried planks are not yet finished material – their surface is rough from the saw and they may be slightly twisted. Before production they need to be flattened and squared. This step includes planing on a thicknesser for precise thickness, cross-cutting and ripping on a panel saw and, where needed, edge-gluing (joining planks side by side for greater width).
To turn a bowl, a square or rectangular piece – a blank – is first cut from the plank. It is roughly rounded on a band saw into an approximately circular shape so that the lathe does not have to remove too much material at once. The finished blank is then mounted on the lathe – either between centres (for cylindrical shapes) or screwed to a faceplate (for bowls and trays).
Step 5 – Turning the bowl (woodturning)

Woodturning is a fascinating craft in which the workpiece rotates and a turning chisel shapes the spinning wood. For bowls and trays, so-called faceplate turning is used – the grain of the workpiece runs perpendicular to the axis of rotation. The turner first shapes the outside of the bowl, then remounts it and hollows out the inside.
When turning oak, attention must be paid to the direction of rotation relative to the growth rings and to the moisture of the surface. Dry wood is easier to work, but at too high a speed it can overheat and burn. Rough shaping is followed by gradual refinement – from a roughing gouge through medium tools to fine scrapers. The surface is then sanded while the lathe is running: first with coarser abrasive paper (80–120), then fine (180–240) and finally very fine (320–400). The goal is a silky-smooth surface without any tool marks.
The finished wooden bowls from AMADEA, such as our wooden bowls and serving plates, go through exactly this process of hand turning and subsequent sanding.
Step 6 – Sanding and finishing work (surface refinement)
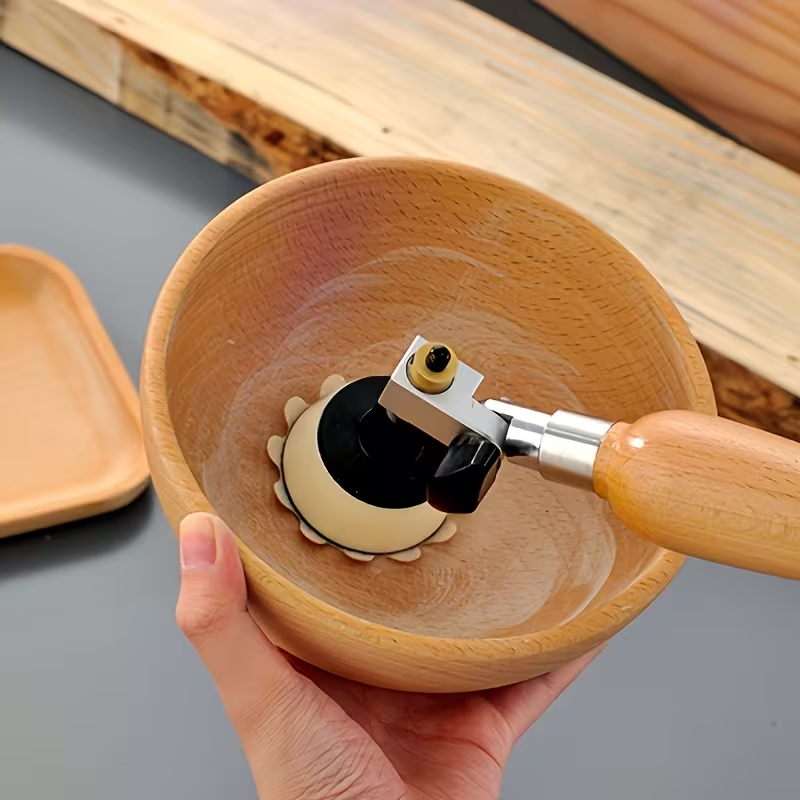
After turning and initial sanding on the lathe comes hand sanding. This is done in several grits of abrasive paper – the technique of progressing through grits is key. Jumping from 80 to 320 is not enough: each grit only removes the scratches left by the previous, coarser one. The right sequence is 80 → 120 → 180 → 240 → 320, with each grit used first along the grain, then across it, then along the grain again.
Between grits, the surface is wiped with a damp cloth, left to dry for 15–20 minutes and then sanded again – this is called de-whiskering. The moisture raises the fibres (grain raising), which are then easier to sand off, so the surface is smoother after finishing. This seemingly small detail is exactly what turns an average product into a premium one.
Step 7 – Finishing: oil, wax and varnish (oiling, waxing, lacquering wood)
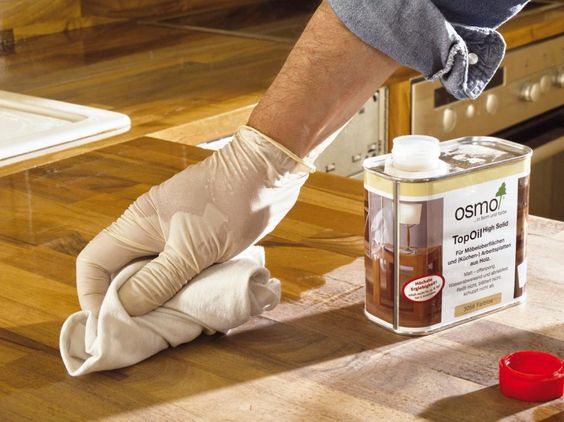
The finish is the final step and also the one that most affects how long the product lasts. Wooden kitchenware – bowls, boards, spoons – follows specific rules: the finish must be food-safe while also protecting the wood from moisture.
Natural oils (linseed, teak, mineral oil) soak into the surface of the wood, strengthen the fibres and create a slightly water-repellent surface. They do not form a film – the wood still feels natural to the touch, and scratches are easily repaired with another coat of oil. AMADEA kitchenware is treated with natural oil. Natural wax (carnauba, beeswax) applied after the oil creates a finer, glossier surface and better protection against water. Varnish or polyurethane coating forms a hard protective film, but it is not recommended for bowls in direct contact with food – it is harder to renew and peels when scratched.
After the oil is applied, the product is left for 15–20 minutes to soak it up, the excess is wiped off with a cloth (careful: rags soaked in linseed oil can self-ignite – always spread them out or soak them in water!) and the product is left to dry for 24–48 hours. The process is repeated 2–3 times, with a light sanding (400–600) between coats.
The most common mistakes when choosing and caring for wooden products
Knowing how wooden products are made also helps when shopping and with everyday care. Here are the three most common misconceptions we come across:
A dishwasher combines high temperature, aggressive detergent and prolonged soaking – a deadly combination for wood. The wood cracks, the finish peels and the product loses its shape. Always wash wooden kitchenware by hand in lukewarm water and dry it immediately.
Dark stains on oak caused by contact with iron (a nail, a metal bowl, a wet knife) are the result of a chemical reaction between tannins and iron ions – it forms iron tannate, the same compound found in ink. The stains can be sanded off, but not washed out. Prevention: do not leave metal objects lying on damp oak.
A genuine oak product has some weight to it – the density of oak is 650–750 kg/m³. If a bowl or board feels suspiciously light, it is most likely made of a lighter wood (poplar, paulownia) or MDF with veneer. Genuine oak can also be recognised by its characteristic tannin scent and its growth rings.
Comparing drying methods and finishes for oak
| Parameter | Air drying | Kiln drying | Combination of both |
|---|---|---|---|
| Duration | 5–7 years (5 cm plank) | 4–8 weeks | 2–3 years + 2–4 weeks |
| Wood stability | Excellent | Medium (risk of stresses) | Very good |
| Costs | Low (space, time) | Higher (energy, equipment) | Medium |
| Final moisture | 10–15 % | 6–10 % | 8–12 % |
| Suitable for | Premium products, furniture | Series production | Kitchenware, decorations |
| Finish | Food contact | Renewal | Appearance |
|---|---|---|---|
| Natural oil | ✅ Safe | Easy (add more oil) | Matt, natural |
| Beeswax / carnauba wax | ✅ Safe | Easy (re-polish) | Soft sheen |
| Linseed oil (polymerised) | ✅ Safe | Moderately easy | Golden tone, semi-matt |
| Polyurethane varnish | ⚠️ OK once fully cured | Difficult (sanding back) | Glossy, plastic look |
| Stain / dye | ❌ Not recommended | Very difficult | Changes the colour of the wood |
Frequently asked questions about working oak and wooden products
How long does it take to air-dry oak?
The rule of thumb is 1 year for every centimetre of plank thickness. A 5 cm oak plank therefore takes roughly 5 years. Kiln drying can shorten the process to 4–8 weeks, but air-dried wood tends to be more stable and less prone to cracking.
Why is oak dried before it is worked?
Freshly felled oak contains 50–80 % water. If it were worked straight away, the product would warp, crack or lose its shape as it dried. Drying reduces the moisture to 8–12 %, the equilibrium value for indoor products.
Which oil is best for finishing an oak bowl?
For oak kitchenware – bowls or chopping boards – linseed oil, a teak finish or special food-safe wood oils work best. Mineral oil is neutral and safe for food contact. Varnishing or staining is not recommended for surfaces that touch food.
How can you tell well-worked oak?
A quality oak product has a smooth surface without splinters or visible sanding marks, an even finish, a firm shape without cracks and a natural honey or golden-brown tone. Medullary rays are also typical of oak – shiny flecks visible on quarter-sawn wood.
Where can I buy a wooden bowl or board made of quality wood?
At AMADEA you will find handmade wooden bowls and plates, serving boards and other wooden kitchenware. All products are treated with natural oil and made in the Czech Republic.
🌳 Looking for a gift made of natural wood? At AMADEA you will find handmade products from Czech forests – from decorations to kitchenware. Every product carries the story of the tree it came from.
Visit AMADEAAuthor: Martin Portych – specialist in wooden products, gift advice and shop content
Editorial policy: Our content is based on the day-to-day practice of the AMADEA shop, the real needs of our customers and a commitment to clear, useful and trustworthy information.